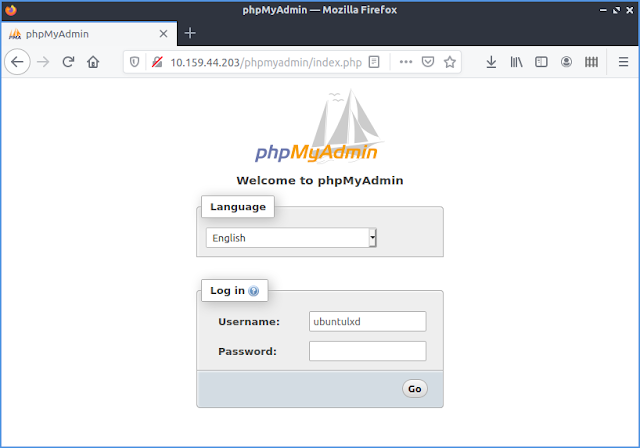
Coming back again, "ten years after", trying to cope with this incredible mess that has resulted from the -admittedly- very good effort of MySQL (and MariaDB) developers to make our databases more secure. Towards this aim, they decided not to allow -at all- the remote login of root user and therefore, "the root MySQL (MariaDB) user is set to authenticate using the auth_socket plugin by default rather than with a password" [1], although at the beginning of the process of securing the db (step 7 below), the sudoer is asked to provide a new password for root user in order to perform subsequent security operations.
And even if "this allows for some greater security and usability in many cases, but it can also complicate things when you need to allow an external program -like phpMyAdmin- to access the user" [1], it appears that this "complication", in case of phpMyAdmin, is easily resolved by a) giving a (strong) password for phpmyadmin user in step 4 below, rather than letting dbconfig-common to randomly generate one, without success b) performing MySQL securing operations (step 7 below) after installing and configuring phpMyAdmin and c) creating a new superuser to access phpMyAdmin web interface, instead of root (step 8).
However, there is no problem to install MariaDB and phpMyAdmin following the instructions in links [3] and [4] respectively.
In what follows, it is assumed that sudoer' s name is usbuntu and machine's hostname is host
1. Install apache2:
usbuntu@host$ sudo apt install apache22. Install MySQL:
usbuntu@host$ sudo apt install mysql-server3. Install php and php-mysql module:
usbuntu@host$ sudo apt install php php-mysql
4. Install phpMyAdmin and during installation configure phpMyAdmin as follows:
usbuntu@host$ sudo apt install phpmyadmin php-mbstring
5. Append the line
Include /etc/phpmyadmin/apache.conf
to /etc/apache2/apache2.conf :
usbuntu@host$ sudo vi /etc/apache2/apache2.conf
6. Restart apache2
usbuntu@host$ sudo systemctl restart apache2
7. Secure mysql (Attention: there is no way to return to shell prompt unless you provide password below and I think -didn't check it- unless you answer all questions afterwards)
usbuntu@host$ sudo mysql_secure_installation
VALIDATE PASSWORD COMPONENT can be used to test passwords
and improve security. It checks the strength of password
and allows the users to set only those passwords which are
secure enough. Would you like to setup VALIDATE PASSWORD component?
Press y|Y for Yes, any other key for No: y
Please enter 0 = LOW, 1 = MEDIUM and 2 = STRONG: 1 (although 2 is more secure)
Please set the password for root here.
New password: ********
Re-enter new password: ********
Estimated strength of the password: 100
Do you wish to continue with the password provided?(Press y|Y for Yes, any other key for No) : y
Remove anonymous users? (Press y|Y for Yes, any other key for No) : y
Disallow root login remotely? (Press y|Y for Yes, any other key for No) : y
Remove test database and access to it? (Press y|Y for Yes, any other key for No) : y
Reload privilege tables now? (Press y|Y for Yes, any other key for No) : y
8. Create new superuser (i.e. supuser) -with full privileges- to connect to phpMyAdmin (replace give_strong_password_here with the password of your choice)
usbuntu@host$ sudo mysql
mysql> CREATE USER 'supuser'@'localhost' IDENTIFIED WITH mysql_native_password BY 'give_strong_password_here';
mysql> GRANT ALL PRIVILEGES ON *.* TO 'supuser'@'localhost' WITH GRANT OPTION;
mysql> quit
/phpmyadmin. e.g. http://example.com/phpmyadmin or http://192.168.1.10/phpmyadmin"[2] or http://localhost/phpmyadmin or http://127.0.0.1/phpmyadmin, using credentials supuser and give_strong_password_hereVersions
Ubuntu LTS focal (20.04)
MySQL Server version: 8.0.22-0ubuntu0.20.04.3 - (Ubuntu)
Apache version: 2.4.41 (Ubuntu)
PHP version: 7.4.3
phpMyAdmin version: 4.9.5deb2
Links
[1] How To Install and Secure phpMyAdmin on Ubuntu 20.04
[2] How To Install & Secure phpMyAdmin for Apache on Ubuntu 20.04
[3] How to Install LAMP Stack on Ubuntu 20.04 Server/Desktop
[4] How to Install phpMyAdmin with Apache (LAMP) on Ubuntu 20.04


No comments:
Post a Comment